Table of Contents
Use to C-3.2inch TFT+Touchscreen Shield
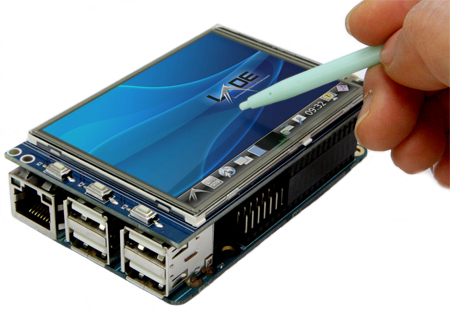
Fully assembled 3.2inch display with 320×240 pixels TFT LCD and a resistive touch overlay. Just plug it on top of ODROID-C1. 2×13 tall female header is already soldered on the PCB.
Fast 30Mhz SPI is used for the faster frame rate.
You will need an official Ubuntu image to configure it. You can simply download the Kernel updates and configure your ODROID-C1 for this display shield.
Specifications
| LCD Type | TFT |
| LCD Interface | SPI |
| Touch Screen Type | Resistive |
| Touch Screen Controller | XPT2046 |
| Colors | 65536 |
| Backlight | LED |
| Resolution | 320*240(Pixel) |
| Aspect Ratio | 4:3 |
| Weight | 44gram |
Used pins
| Pin Num | Symbol | Description |
|---|---|---|
| 1, 17 | 3.3V | Power positive (3.3V power input) |
| 2, 4 | 5V | Power positive (5V power input) |
| 3, 5, 7, 8, 10, 22 | NC | No connection |
| 6, 9, 14, 20, 25 | GND | Ground |
| 11 | TP_IRQ | Touch screen interrupt, low level while the touch screen detects touching |
| 12 | KEY1 | Export GPIO#87, Wiring Pi GPIO#1 |
| 13 | RST | Reset, Export GPIO#116 |
| 15 | LCD_RS | LCD instruction control, Instruction/Data Register selection, Export GPIO#115 |
| 16 | KEY2 | Export GPIO#104, Wiring Pi GPIO#4 |
| 18 | KEY3 | Export GPIO#102, Wiring Pi GPIO#5 |
| 19 | LCD_SI/TP_SI | SPI data input of LCD/touch screen |
| 21 | LCD_SO/TP_SO | SPI data output of LCD/touch screen |
| 23 | LCD_SCK/TP_SCK | SPI clock of LCD/touch screen |
| 24 | LCD_CS | LCD chip selection, low active |
| 26 | TP_CS | Touch screen chip selection, low active |
How to activate the 3.2inch LCD shield with your ODROID-C1
You need a HDMI connection or a Serial console connection to follow below instruction.
Configuring framebuffer and Touch driver
0. Update your Kernel
sudo apt-get update
sudo apt-get upgrade
sudo apt-get dist-upgrade
1. Insert modules
sudo modprobe spicc
sudo modprobe fbtft_device name=odroidc_tft32 rotate=270 gpios=reset:116,dc:115 speed=32000000 cs=0
You will have a new frame buffer /dev/fbX
Find a framebuffer node.
ls /dev/fb*
/dev/fb2
cat /sys/class/graphics/fb2/name
fb_odroidc_tft32
Run Console
0. Install package
sudo apt-get install fbset
1. Run con2fbmap
con2fbmap <console> <framebuffer>
sudo con2fbmap 1 2
2. Change foreground virtual terminal
The command chvt N makes /dev/ttyN the foreground terminal.
sudo chvt 1
chvt 1 : console
chvt 7 : X11
Run Xwindow
0. Create a new config file
sudo mv /etc/X11/xorg.conf /etc/X11/xorg.conf.old
sudo vi /etc/X11/xorg.conf
1. And then, add following lines in "/etc/X11/xorg.conf" file.
Section "Device"
    Identifier    "C fbdev"
    Driver        "fbdev"
    Option        "fbdev" "/dev/fb2"
EndSection
2. Run
sudo /etc/init.d/lightdm restart
sudo chvt 7

