Application launching with GPIO trigger on Android
You must install the Android release V2.9(C2)/V4.5(XU4) or higher to launch app via GPIO.
In that case you can skip step 1 ~ 7 for your easier life ![]()
If you installed higher version of the Android Marshmallow version v2.9, Please do just step 3 and 4, and skip to 7
Please check the revision of PCB. This page is based on the board revision 0.2.(C2)
This page explains how to launch an app via GPIO input.
All of software stuff(Step 1 to 7) was included from Android image Ver2.9 to Ver3.4 and Marshmallow Ver2.4 released.
1. Enable the GPIO key driver as a built-in.
...
CONFIG_KEYBOARD_GPIO_POLLED=y
...
2. Add gpio key mapping to device tree blob.
ODROID-C2
(path: arch/arm64/boot/dts/meson64_odroidc2.dts)
GPIO Pin description
commit
gpio_keys_polled {
   status = "disabled";
   compatible =
    "gpio-keys-polled";
   #address-cells = <1>;
   #size-cells = <0>;
   poll-interval = <100>;
   autorepeat;
   button@1 {
    label = "GPIO Key F7";
    linux,code = <65>;
    gpios = <&gpio GPIOX_19 1>;
   };
   button@2 {
    label = "GPIO Key F8";
    linux,code = <66>;
    gpios = <&gpio GPIOX_11 1>;
   };
   button@3 {
    label = "GPIO Key F9";
    linux,code = <67>;
    gpios = <&gpio GPIOX_9 1>;
   };
   button@4 {
    label = "GPIO Key F10";
    linux,code = <68>;
    gpios = <&gpio GPIOX_7 1>;
   };
 };
ODROID-XU3/XU4
(path: arch/arm/boot/dts/exynos5422-odroidxu3.dts)
GPIO Pin description
Shift shield GPIO map
commit1
commit2
gpio_keys_polled {
   status = "disabled";
   compatible =
    "gpio-keys-polled";
   #address-cells = <1>;
   #size-cells = <0>;
   poll-interval = <100>;
   autorepeat;
   button@1 {
    label = "GPIO Key F7";
    linux,code = <65>;
    gpios = <&gpx1 2 0xf>;
   };
   button@2 {
    label = "GPIO Key F8";
    linux,code = <66>;
    gpios = <&gpx1 5 0xf>;
   };
   button@3 {
    label = "GPIO Key F9";
    linux,code = <67>;
    gpios = <&gpx1 6 0xf>;
   };
   button@4 {
    label = "GPIO Key F10";
    linux,code = <68>;
    gpios = <&gpx1 3 0xf>;
   };
 };
3. Enable GPIO Key map.
gpio_keys_polled {
   status = "okay";
   .
   .
};
4. Build the kernel source. and flash the kernel image to the board.(C2)
$ cd kernel
$ export ARCH=arm64
$ export CROSS_COMPILE=aarch64-linux-gnu-
$ make odroidc2_i2c_defconfig  #(or make odroidc2_defconfig)
$ make -j8
$ adb reboot fastboot
$ fastboot flash dtb arch/arm64/boot/dts/meson64_odroidc2.dtb
$ fastboot flash boot arch/arm64/boot/uImage
$ fastboot reboot
5. Add key event keycode to system/usr/keylayout/Vendor_0001_Product_0001.kl file.
You can find keycode table from reference
ODROID-C2
commit
ODROID-XU3/XU4
commit
...
key 65 F7
key 66 F8
key 67 F9
key 68 F10
...
6. Apply the patch that intercept key event to frameworks/base & ODROID Utility App.
ODROID-C2
frameworks/base commit
ODROID Utility commit
ODROID-XU3/XU4
frameworks/base commit
ODROID Utility commit
7. Build the Android image and flash it.
ODROID-C2 build method
ODROID-XU3/4 install method
$ cd <PATH_TO_ANDROID_ROOT>
$ cd out/target/product/odroidc2/
$ adb reboot fastboot
$ fastboot flash system rootsystem.img
$ fastboot reboot
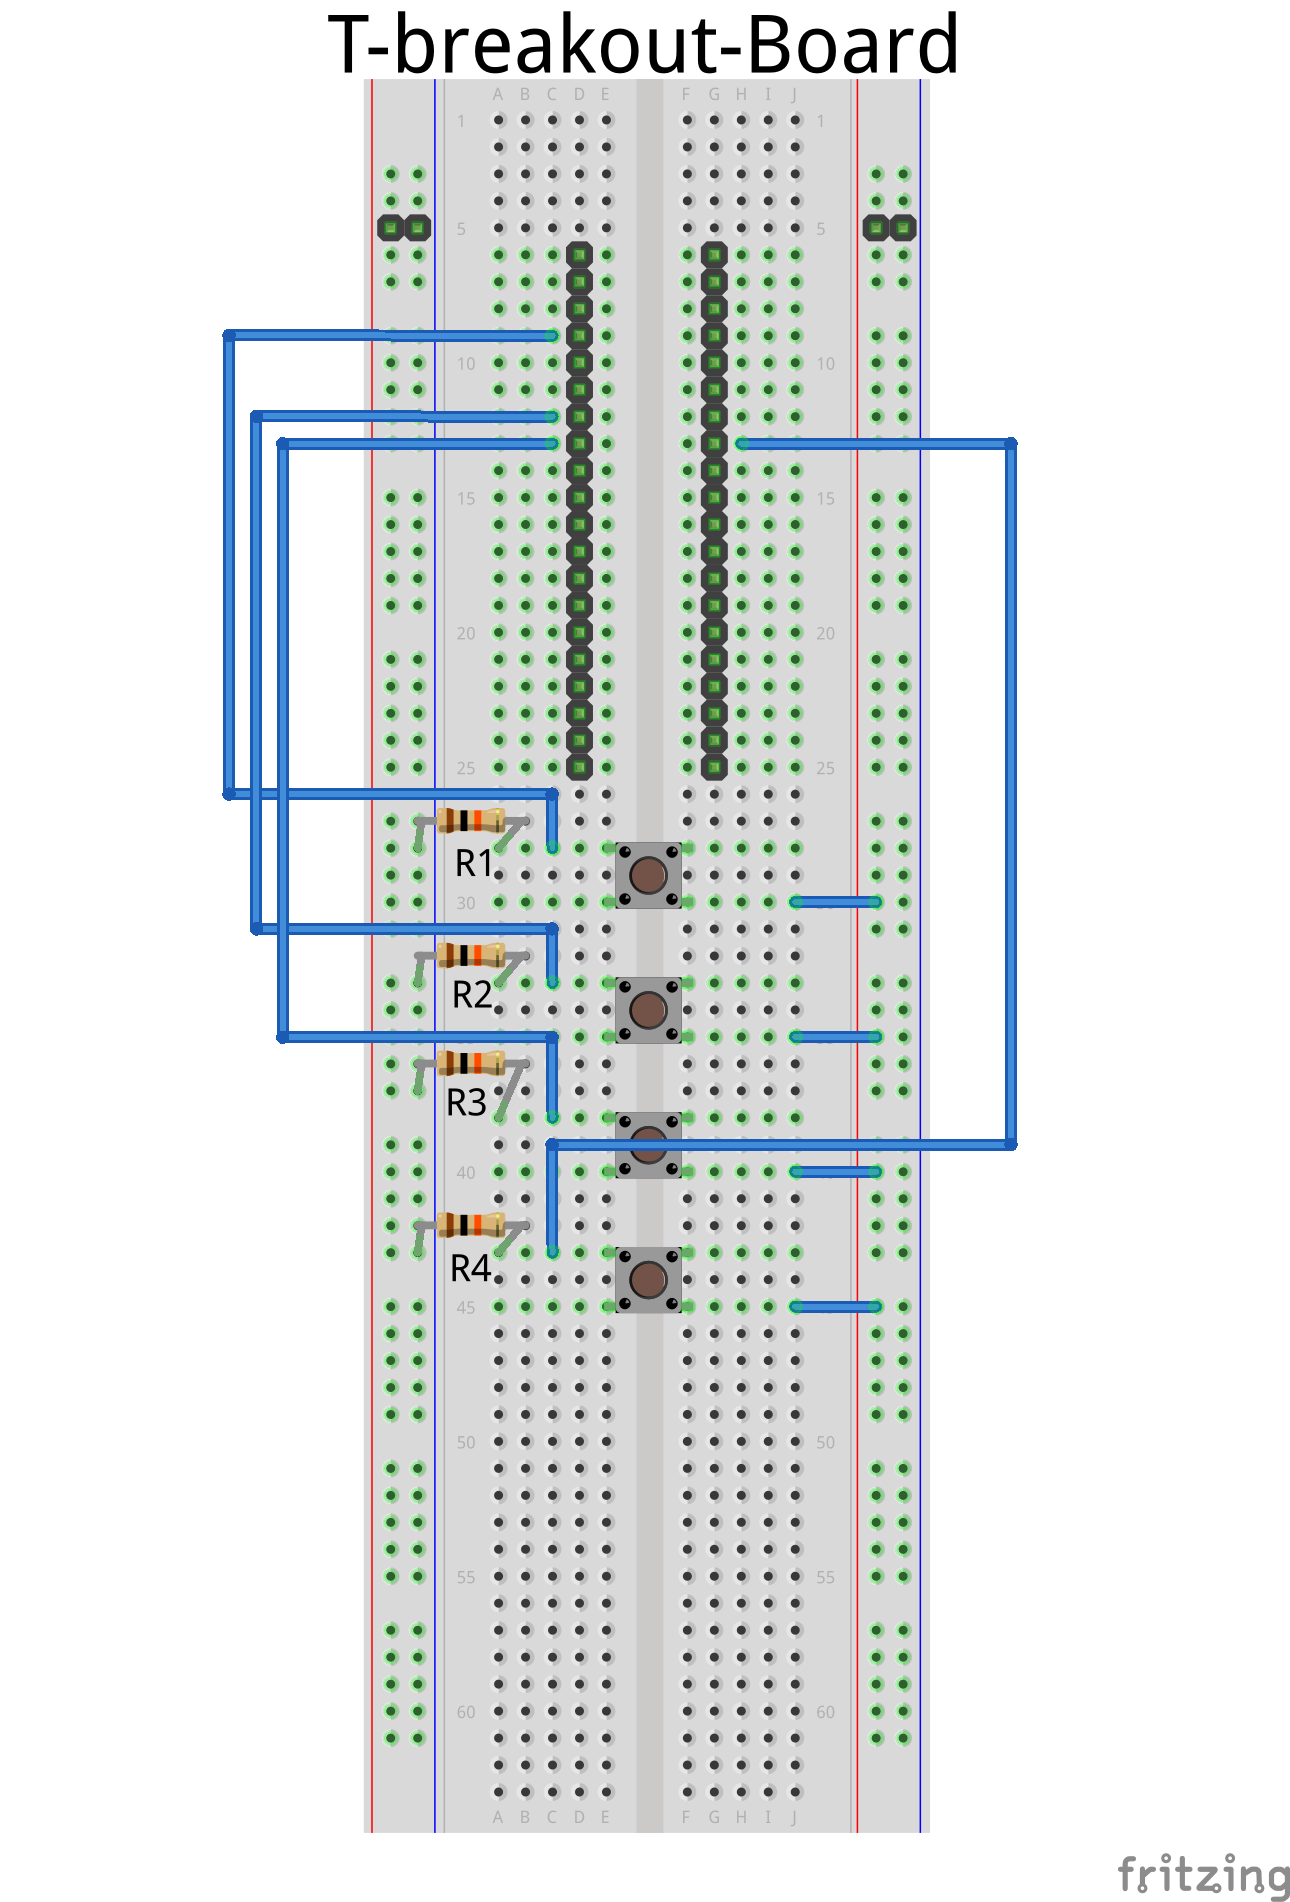
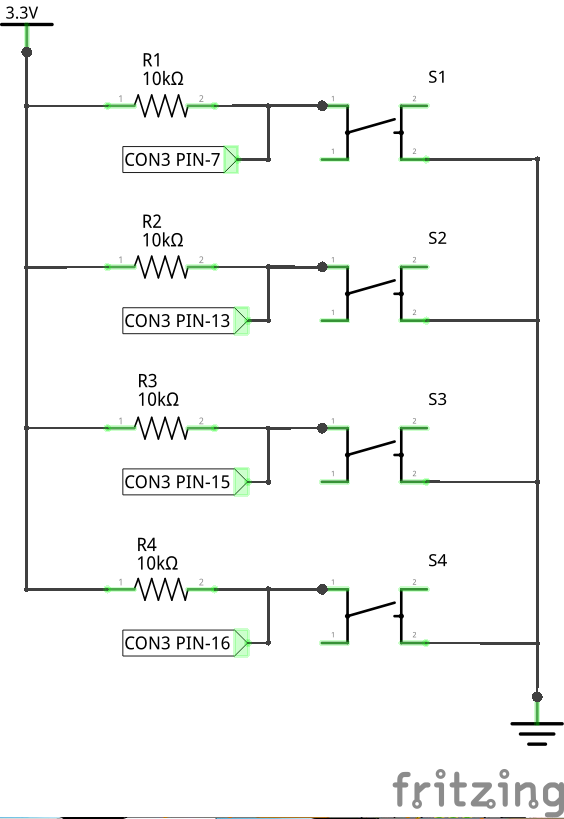
8. Connect a few buttons to the GPIOs with 10KOhm pull-up resistors. Click images to enlarge it.
ODROID-C2
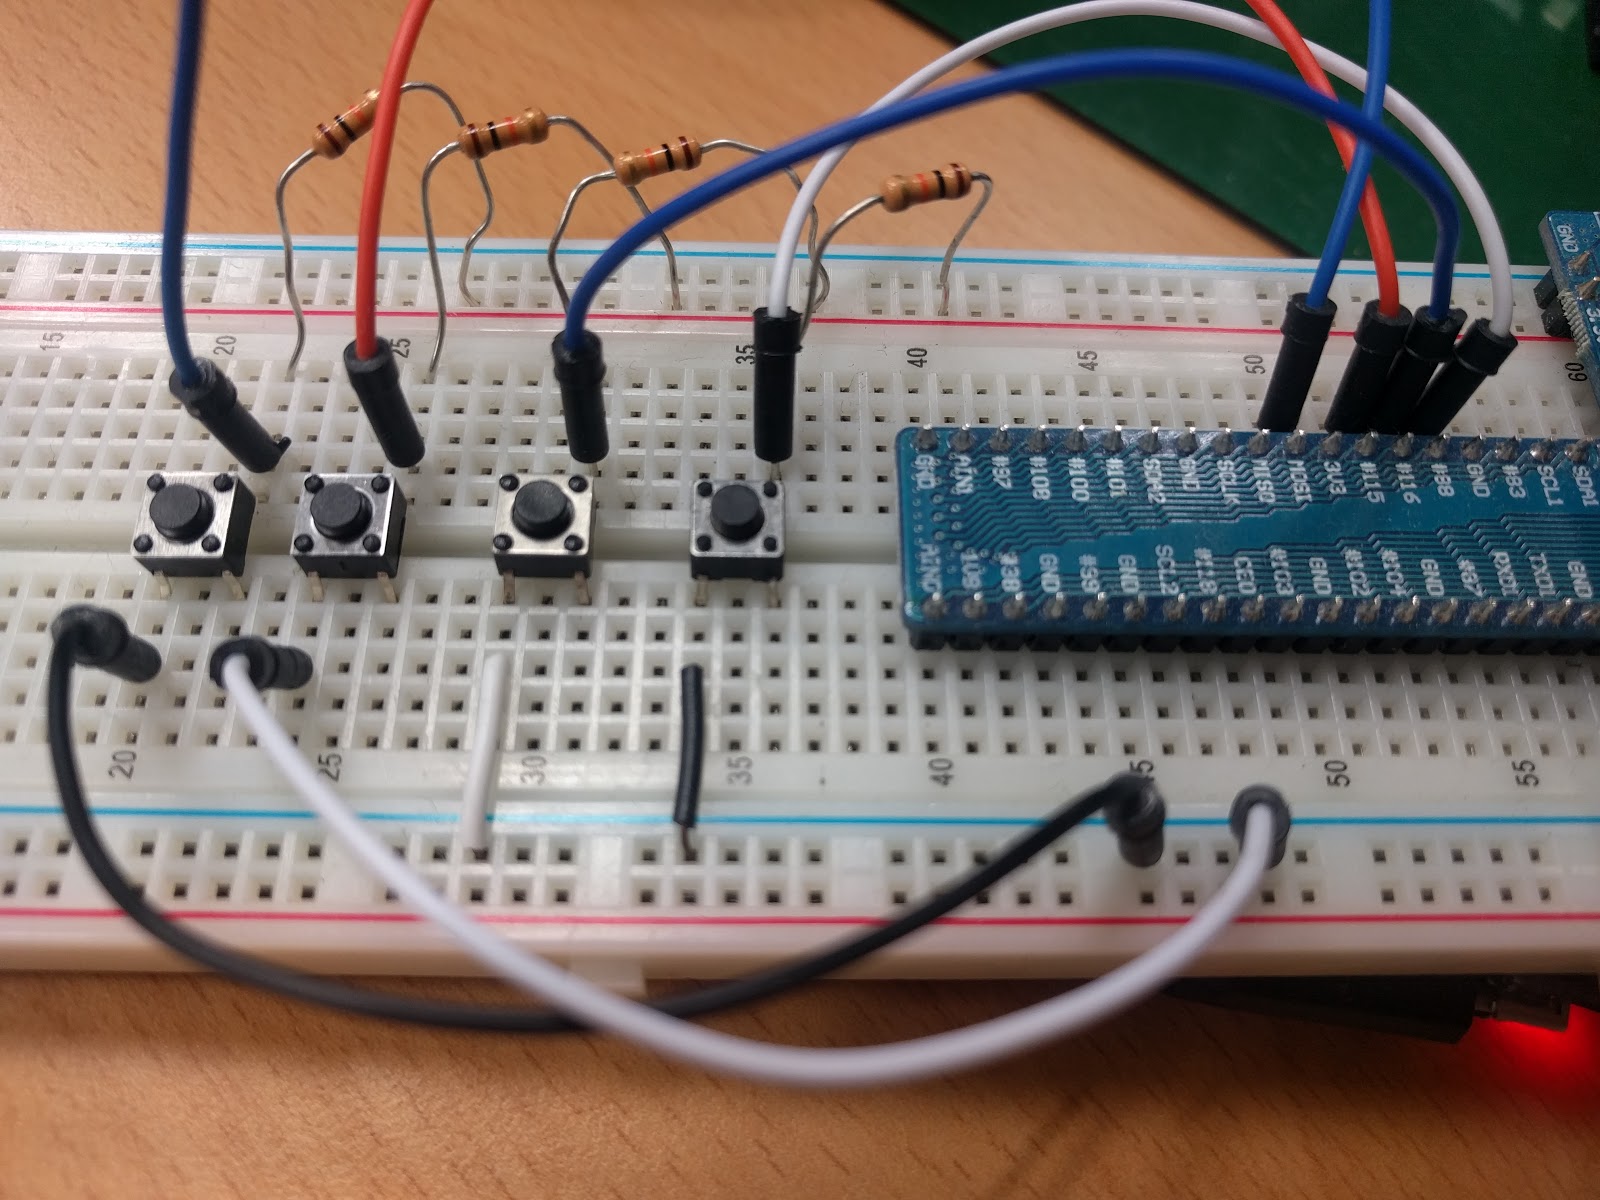
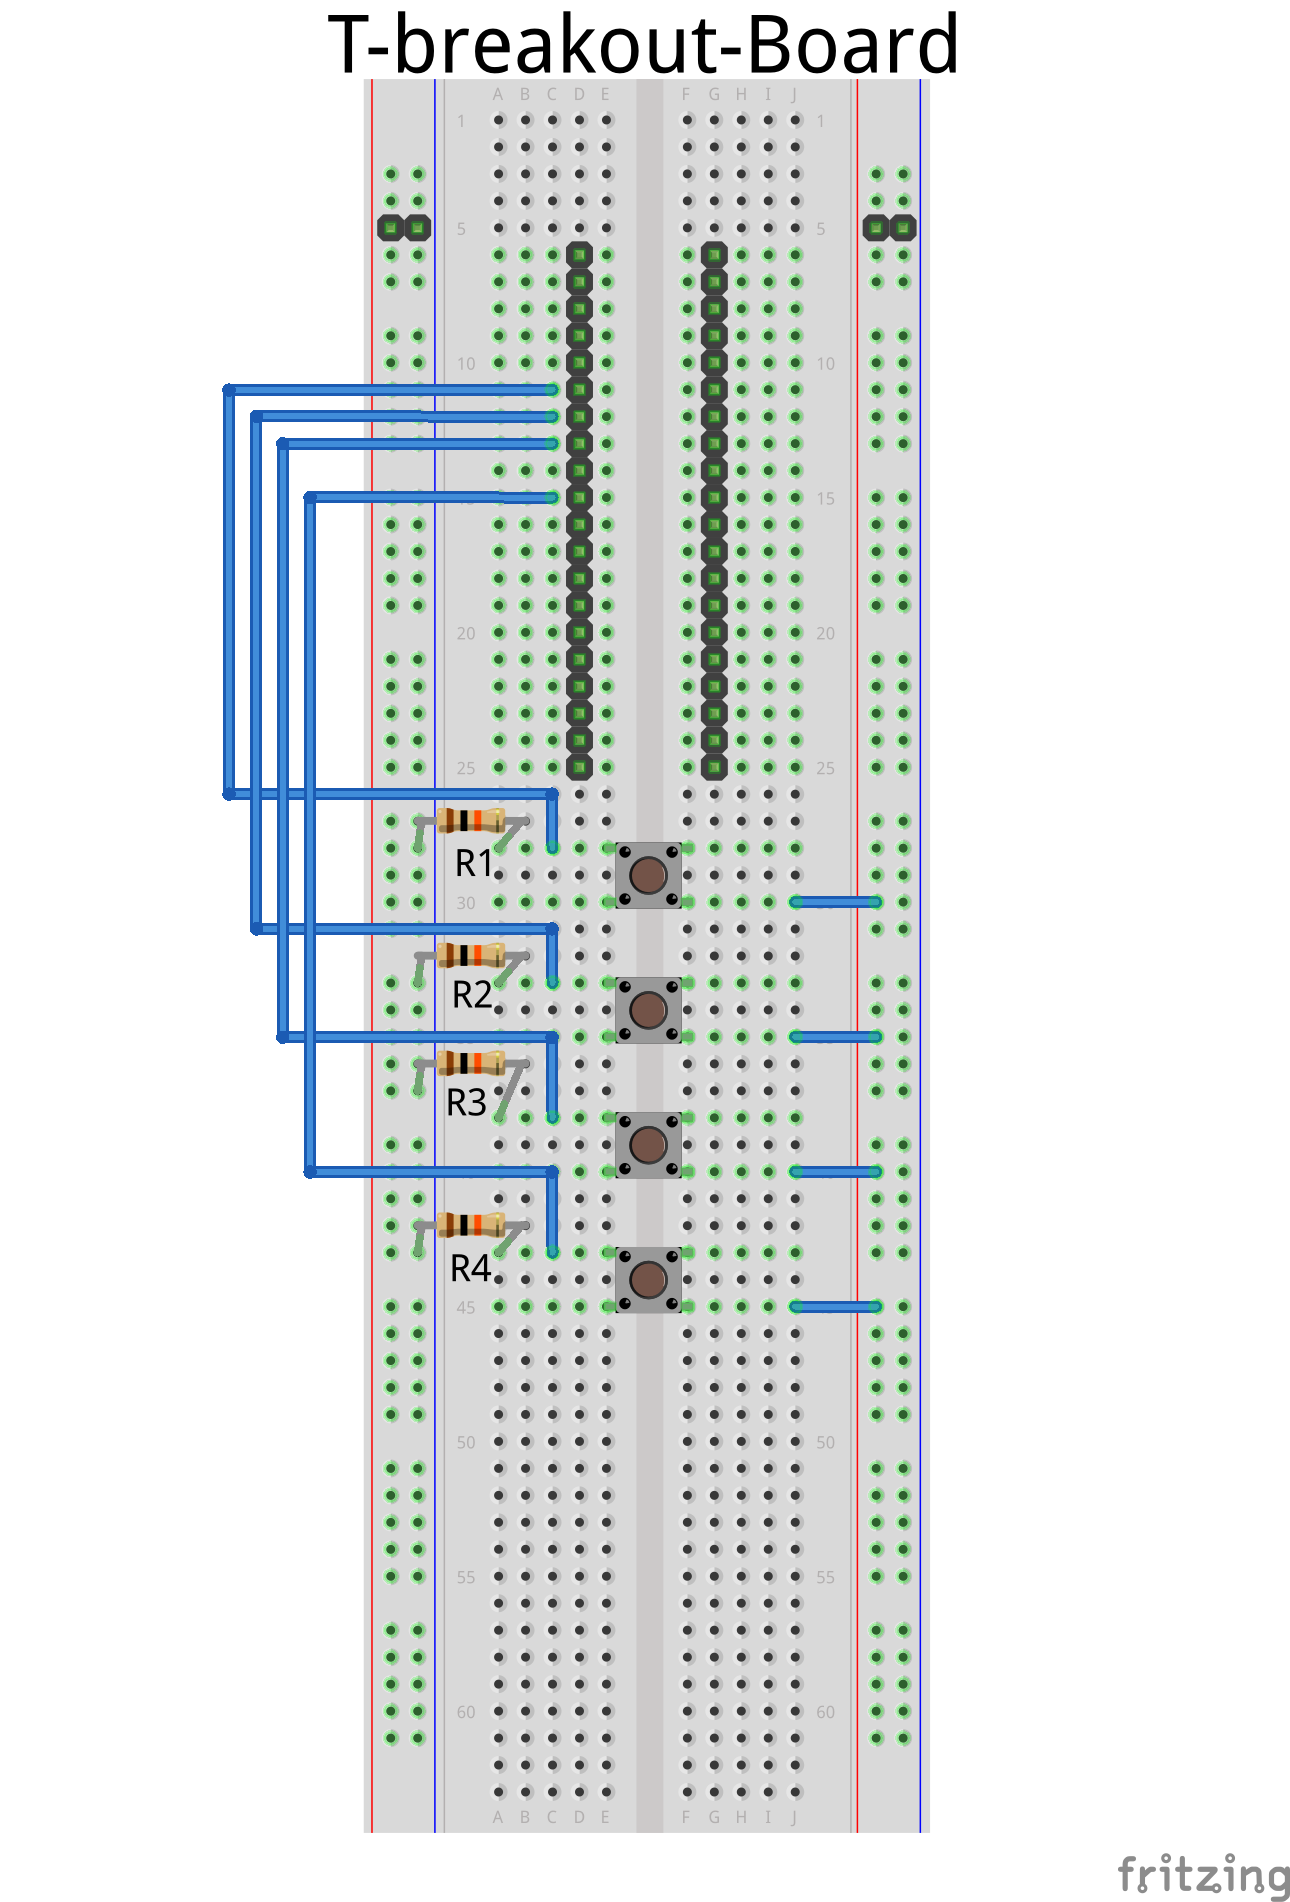
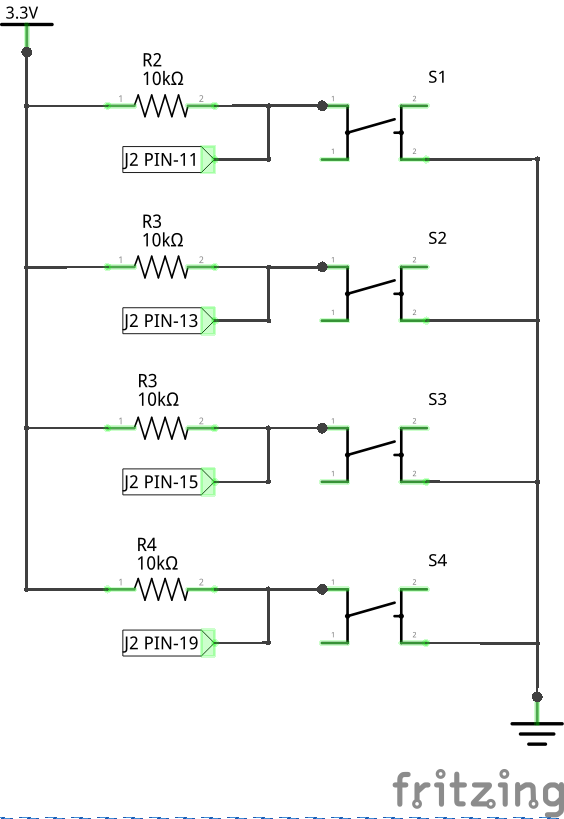
ODROID-XU3/XU4
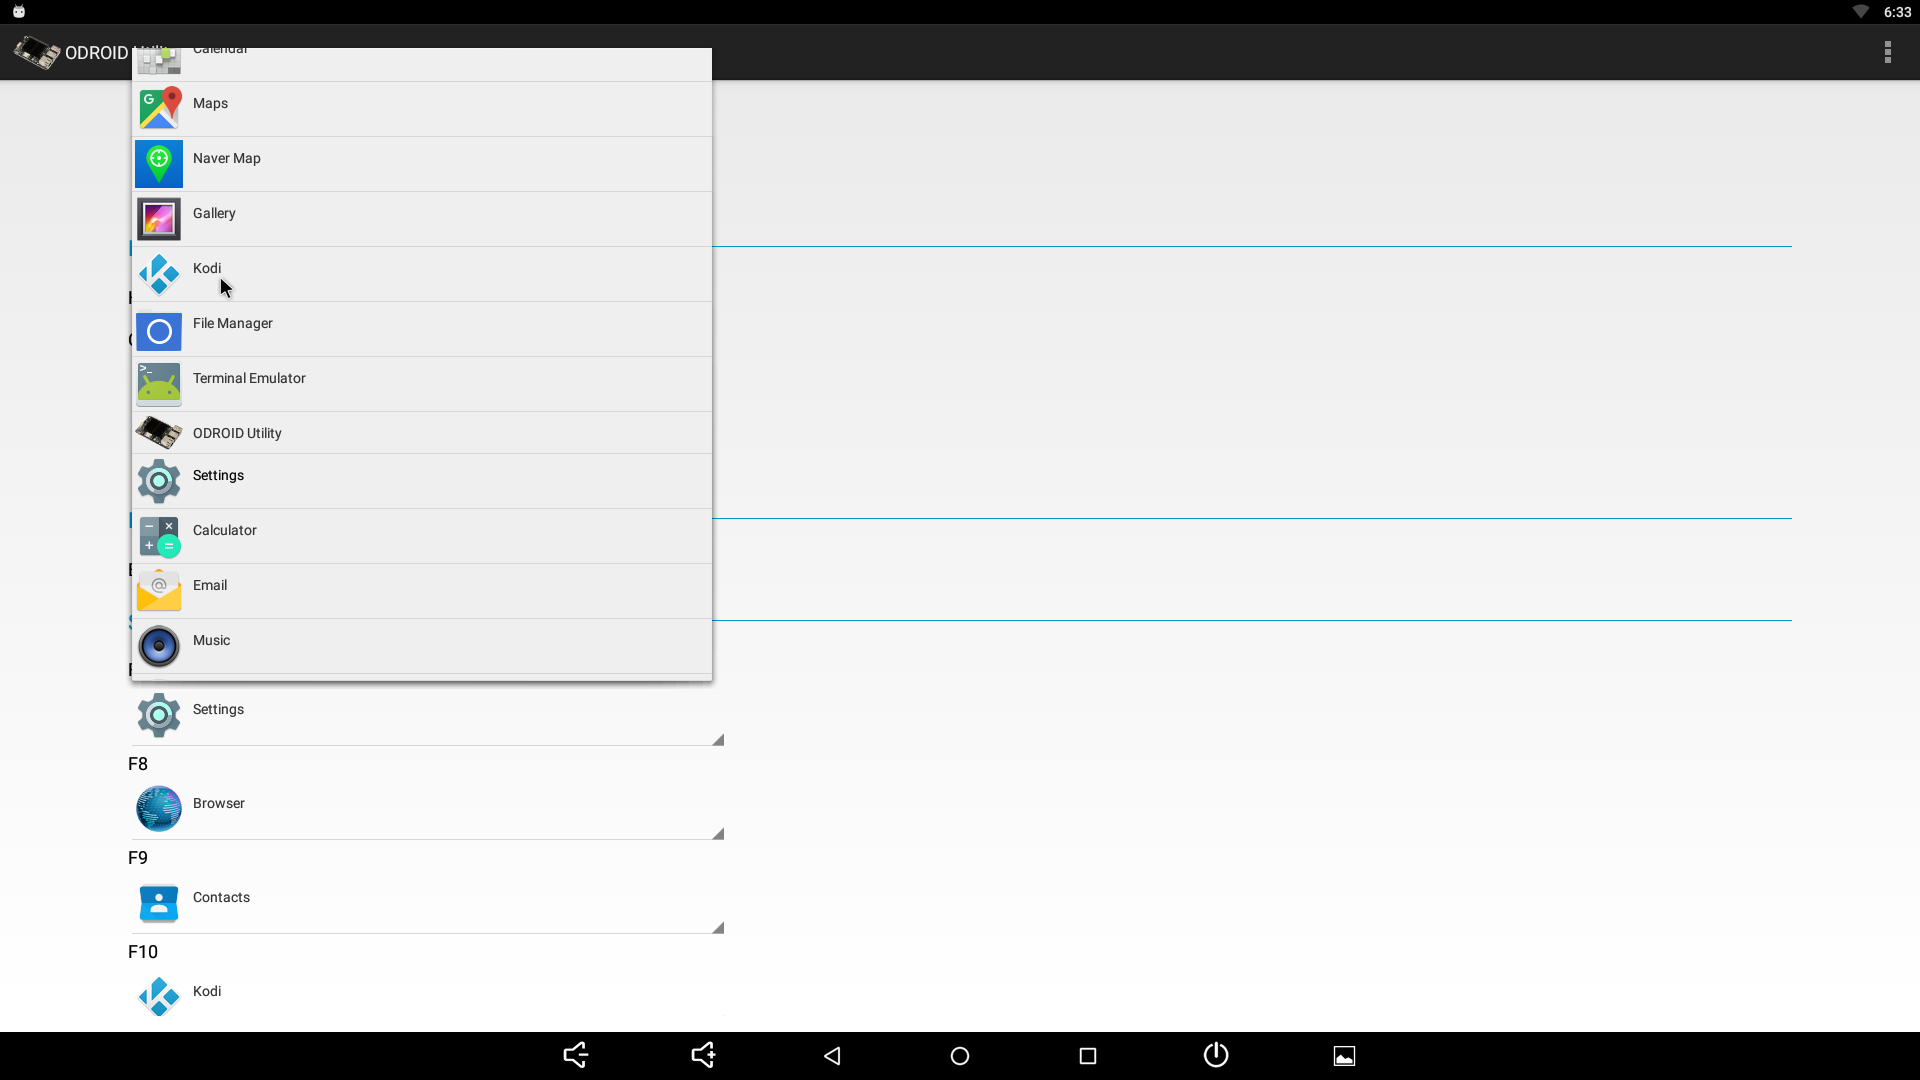
9. Set the launch app by using ODROID Utility app.