Table of Contents
OMV(Open Media Vault) on ODROID-XU4
1. Download the latest OMV image
https://sourceforge.net/projects/openmediavault/files/Odroid-XU3_XU4/
Archives can be uncompressed with 7-Zip pm Windows, Keka on OS X and 7z on Linux.
2. Flash OS image into micro-SD on your host computer

Make sure you have a good & reliable SD card. RAW images can be written with Etcher (all OS).
You can find the Etcher from this link.
* The current OMV image has a compatibility issue with eMMC and it can't boot from eMMC. I hope it will be fixed soon.
3. Wait enough time until auto-reboot done
Plug a 15V DC plug to your CloudShell2 and wait 3~4 minutes.
Don't forget to connect an internet accessible network cable to the CloudShell for proper installation.
You can see a Linux login screen on the small TFT LCD while OMV OS is initializing the system.
After initializing, it will reboot the system automatically.
Don't interrupt this process.
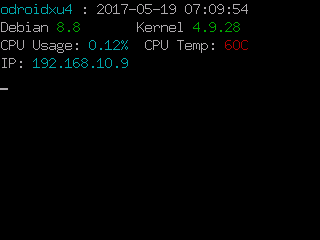
If you wait enough time, you will see this system information on the LCD.

4. Run web browser and configure OMV on Web UI
Open a web browser and enter your IP address.
The IP address can be found on the TFT LCD or by scanning the local area network.
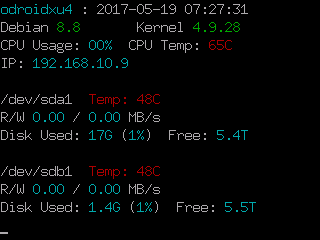
Once you mount the disks with Storage –> File Systems menu, the TFT LCD will show the disk information.

Refer this official OMV guide to complete the OMV configuration.
http://wiki.openmediavault.org/index.php?title=Configuration
5. Update system software
System → Update Management on web-UI.
Check available updates and Choose all the available updates and Upgrade the system.
You will probably have some updated Debian packages, newer Open Media Vault package and newer Kernel.
You might need to reboot after system software update.
Credits
Many thanks to OMV team for releasing the OMV images for ODROID boards.
If you think the OMV is useful, please donate to OMV team!
http://www.openmediavault.org/donate.html