I2C interface using the GPIO pins
This page introduces how you can I2C interface using GPIO pins.

Note the GPIO-I2C support 1.8 Volt interface like other IO ports on Exynos processor.
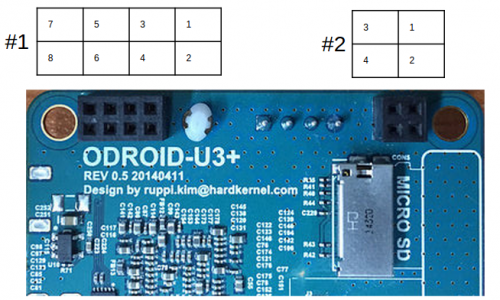
J4 - 2×4 pins(IO Port #1)
| Pin Number | Expansion Net Name | Export Number | Pin Number | Expansion Net Name | Export Number |
|---|---|---|---|---|---|
| 1 | XEINT_8 (GPX1.0) | #199 | 2 | 1.8V Power | |
| 3 | XEINT_9 (GPX1.1) | #200 | 4 | XURXD_0 (UART_0_RXD) | /dev/ttySAC0 |
| 5 | XEINT_13 (GPX1.5) | #204 | 6 | XUTXD_0 (UART_0_TXD) | /dev/ttySAC0 |
| 7 | Ground | 8 | 5V0 Power |
If your ODROID-U3 have old version kernel you need to update using odroid-utility.
sudo odroid-utility.sh
First, You will update the apt-get to install i2c-tools on your ODROID-U3.
sudo apt-get update
sudo apt-get install i2c-tools
Then, You can see i2c devices with i2cdetec command.
sudo modprobe i2c-dev
sudo i2cdetect -l
To use GPIO-I2C you need to load i2c-gpio-custom device driver module.
Usage : i2c-gpio-custom bus[0..3]=I2CBUS,SDA,SCL
sudo modprobe i2c-gpio-custom bus0=4,200,199
sudo i2cdetect -l