Table of Contents
Introduction U3 I/O shield on ubuntu
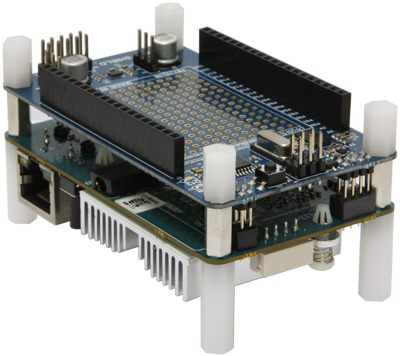
The ODROID-U3 I/O Shield board can be plugged on the neat of ODROID-U3 via tiny 8 pin and 4 pin IO connector.
The shape and dimension are exactly same as ODROID-U3. It comes with 12pcs of PCB spacers for easier and solid stacking assembly.
The IO shield has 3 blocks.
- I2C IO expansion block
- Arduino Compatible block
- SPI Interface block(ODROID-U3+ and I/O shield Rev_0.3 or later)
I2C IO expansion block
TI's TCA6416A I2C to Parallel Port Expander is used in this block.
The major benefit of this device is its wide VCC range.
It can operate from 1.65 V to 5.5 V on the P-port side and on the SDA/SCL side separately.
It allows bidirectional voltage-level translation GPIO Expansion between 1.8V SCL/SDA(VCCI) and 5Volt Port(VCCP).
Access GPIO from linux user space.
Standard Linux kernel have inside a special interface allow to access to GPIO pins.
1. Need to super-user permition
sudo su
[sudo] password for odroid : odroid
2. Load the kernel modules
modprobe i2c-gpio-custom bus0=4,200,199
modprobe gpio-pca953x
3. Set the I2C address of the module
echo tca6416 0x20 > /sys/devices/platform/i2c-gpio.4/i2c-4/new_device
4. Enable GPIO's on the board.
If Kernel version is higher than 3.8.13.30 gpio_n = 341 ~ 356
else Kernel version is older than 3.8.13.30 gpio_n = 289 ~ 304
echo NUM > /sys/class/gpio/export
cd  /sys/class/gpio/gpioNUM
echo out > direction
echo 1 > value
echo 0 > value
Arduino Compatible block
Atmel’s ATmega328P is used as a slave CPU to expand the IO port.
You can use the Arduino IDE on ODROID-U3 to build & upload your sketches to this Arduino-compatible block,
without additional/external cable connections.
Like the Arduino Uno, it has 14 digital input/output pins (of which 6 can be used as PWM outputs),
6 analog inputs which provides 10 bits of resolution. They operate at 5 volts range.
