Table of Contents
Flashing S/W Release
This page introduce you how you can flash S/W release onto your eMMC or MicroSD and can boot without a failure or panic. ![]() So here is the generic process for ODROID boards to install new S/W release.
So here is the generic process for ODROID boards to install new S/W release.
Downloading
Download the S/W release image from our server. The server or URL is shared whenever a new release is announced. Basically Hardkernel release two different O/S images officially, Android and Linux (Ubuntu).
Checking the file integrity
After downloading the file, you can check the file integrity with md5sum. When you download the file, there should be another file with an extension of .md5sum. It is a plan text file which includes the md5sum value. Generate the md5sum value with md5sum command in Linux. If you use Windows, the WinMD5 is a good solution. www.winmd5.com And compare the generated value with the file content.
Extracting
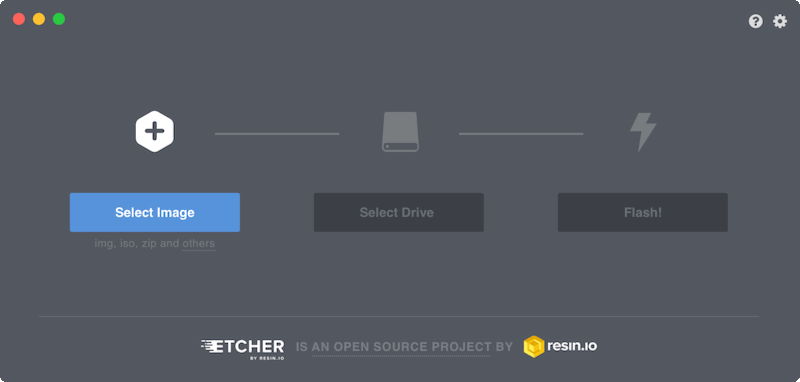
Etcher Flashing tool supports decompression on the fly. So you can skip this step if you use Etcher.
Note that if the compressed image has 7z extension, you have to uncompress it first since Ethcher doesn't support 7z yet.
The Linux S/W release from Hardkernel are basically compressed as .xz format and Android images are compressed with ZIP.
Therefore you must extract the file with particular uncompressing tools to obtain the binary to flash.
Based on the feedback from many ODROID users, we strongly recommend 7-zip for Windows or Linux user, and unxz for Linux users.
Since other extract tools could make dirty chunk while extracting. Click this to download 7-zip and select a proper version for your desktop.
Flashing
You also need a special tool to flash the image into your eMMC or MicroSD, since the S/W release binary is not a regular file as is in the storage.
Using Etcher
Click THIS to download the Etcher flashing utility.
It works with Linux, Windows and Mac
It has easy GUI and nice Validated Flashing feature.

Using Win32DiskImager
Click *THIS* to download the Flashing Utility.
You can easily select an O/S image to flash from a dialog box and show you the progress of flashing once you click Write button.
Just make sure if your USB card reader is inserted with eMMC or MicroSD properly before you click the button.
Don't forget to run win32diskimager as administrator!

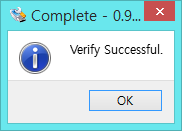
After writing, you must click the “Verify” button if you want to verify the written data. Strongly recommended!
You will see this popup window if the OS image is properly written to the flash storage.

Trouble shooting
If your SD card doesn't boot, it is very worth to perform the FakeFlashTest and SD-Formatter Full-format not Quick-format.
FakeFlashTest
SD-Formatter
Using dd (Disk Destroyer)
dd is included in most Linux distribution by default and very useful tool to maintain your storages. In contrast, it is very harmful as its name if you use wrong command. For example, if can destroy your desktop with your ODROID image which is to be installed into your MicroSD.
Here is the example to use the command.
$ sudo dd if=<my/odroid/image.img> of=</dev/path/of/card> bs=1M conv=fsync
$ sync
In order to flush all cached data into MicroSD, you MUST do the command sync multiple times. Otherwise data would be corrupted.
The image file would be compressed to decrease the file size, and its file name must be terminated with .xz, in that case you must extract the file to obtain correct image which terminate with .img.
$ unxz my-odroid-image.img.xz
We are strongly recommend to check the exact path of your USB card reader to flash before starting dd command. Or you can easily find the card reader from /dev/disk/by-id/ instead of /dev/sdb or /dev/sdc. For example, if you use the Transcend USB card reader and it would show as /dev/disk/by-id/usb-TS-RDF5_SD_Transcend_000000000039-0. This use long path but no harmful to destroy my desktop at all by mistake.
In order to verify the written image with the Linux PC, refer this script. How to VERIFY
Notes
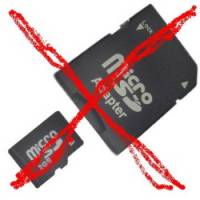
Many SD-to-MicroSD adapter don't work correctly.
You need to connect the flash storage to your USB reader directly.

Booting
If you are done properly up to Flashing, you can boot your ODROID board. Just insert your card into a slot of the board, and connect DC adaptor to a DC-jack. And watch the LED status on the board. Basically all ODROID board have one or two LEDs and one of them is dedicated to monitor the board status, LED color is different depeind on the board model. When power is on and boot loader is running, a LED keeps to turn on. And When the board loads Linux kernel image and kernel image is started properly, the LED will start blinking. Which means the board is booted properly.
It would be also nice if you can check the console log thru serial connection or a display out like LCD/DVI/HDMI.
USB Card Reader Compatibility issue on the eMMC connection to your PC
You may have a doubt if your USB card reader works to flash the O/S images. In general, most of USB card reader works well in the market. But if you like to check or listen other users regarding the USB card reader, please visit here.
Tips
Verifying the burned image with Linux
$ sudo dd if=</dev/path/of/card> bs=512 count=$((`stat -c%s <my/odroid/image.img>`/512)) | md5sum
167742+0 records in
167742+0 records out
85883904 bytes (86 MB, 82 MiB) copied, 0.153662 s, 559 MB/s
9b085251a00ad7ae16fe42fbfb25c042  -
$ dd if=<my/odroid/image.img> bs=512 count=$((`stat -c%s <my/odroid/image.img>`/512)) | md5sum
167742+0 records in
167742+0 records out
85883904 bytes (86 MB, 82 MiB) copied, 0.140843 s, 610 MB/s
9b085251a00ad7ae16fe42fbfb25c042  -
Compare above two MD5 values. They must be identical.
This method was supplied by hyphop