Table of Contents
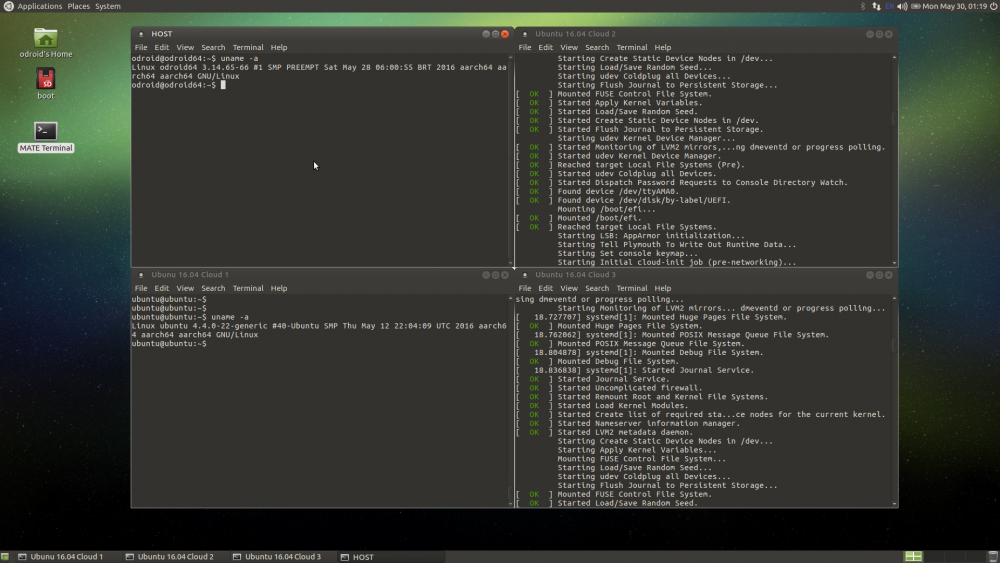
Running Ubuntu 16.04 Cloud image using KVM/ARM
The CPU core in ODROID-C2 is the Cortex-A53 processor. The Cortex-A53 processor supports the virtualization extensions to support the virtualization. It means ODROID-C2 is able to support the virtualization using the well-known hypervisors such as KVM and Xen. This is a step-by-step guide of how to run unmodified Ubuntu Cloud using KVM/ARM on ODROID-C2 Ubuntu.
Changing timer
ODROID-C2 use the SoC vendor specific timer, “meson-timer”, due to the GPU and VPU performance. But, meson-timer does not support KVM. First of all, the timer should be changed to “armv8-timer” to support the KVM/ARM.
Modify the '/media/boot/boot.ini' file. Change the mesontimer environment variable to “0”.
odroid@odroid64:~$ sudo vi /media/boot/boot.ini
- /media/boot/boot.ini
# Meson Timer
# 1 - Meson Timer
# 0 - Arch Timer
# Using meson_timer improves the video playback whoever it breaks KVM (virtualization).
# Using arch timer allows KVM/Virtualization to work however you'll experience poor video
setenv mesontimer "0"
And then, the system need reboot in order to apply changed timer setting.
odroid@odroid64:~$ sudo reboot
Check whether the KVM is enabled or not.
odroid@odroid64:~$ dmesg | grep kvm
[    0.487913] kvm [1]: Using HYP init bounce page @5aaf2000
[    0.488039] kvm [1]: interrupt-controller@c4304000 IRQ25
[    0.497607] kvm [1]: timer IRQ27
[    0.497619] kvm [1]: Hyp mode initialized successfully
Installing packages & Downloading images
We need not only QEMU in order to run and manage guest system but cloud-utils for account setting.
odroid@odroid64:~$ sudo apt install -y qemu qemu-utils cloud-utils
Download BIOS and Ubuntu 16.04 cloud images.
odroid@odroid64:~$ wget https://releases.linaro.org/components/kernel/uefi-linaro/15.12/release/qemu64/QEMU_EFI.fd
odroid@odroid64:~$ wget https://cloud-images.ubuntu.com/xenial/current/xenial-server-cloudimg-arm64-uefi1.img
Setting & Running Ubuntu 16.04 Cloud
Cloud images are plain - there is no user setup, no default user/password combo, so to log in to the image, we need to customize the image on first boot. The defacto tool for this is cloud-init. The simplest method for using cloud-init is passing a block media with a settings file - of course for real cloud deployment, you would use one of fancy network based initialization protocols cloud-init supports. Enter the following to a file, say cloud.txt:
Create cloud.txt in order to set the default user account.
odroid@odroid64:~$ cat > cloud.txt <<EOF
#cloud-config
password: odroid
chpasswd: { expire: False }
ssh_pwauth: True
EOF
odroid@odroid64:~$ cloud-localds cloud.img cloud.txt
Run the Ubuntu 16.04 cloud now. (user: ubuntu, password: odroid)
odroid@odroid64:~$ qemu-system-aarch64 -smp 2 -m 1024 -M virt -bios QEMU_EFI.fd -nographic \
       -device virtio-blk-device,drive=image \
       -drive if=none,id=image,file=xenial-server-cloudimg-arm64-uefi1.img \
       -device virtio-blk-device,drive=cloud \
       -drive if=none,id=cloud,file=cloud.img \
       -netdev user,id=user -device virtio-net-device,netdev=user \
       -enable-kvm -cpu host
- -smp: Virtual CPU count
- -m: Memory size
- -bios: Firmware image
- -nographic: Console display only
- -enable-kvm: Use KVM for the guest
- -cpu host: CPU is same between host and guest
How do you increase a guest's disk size?
- Stop the VM
- Run 'qemu-img resize <guest image> +10G' to increase image size by 10Gb
- Start the VM, resize the partitions and LVM structure within it normally
