Table of Contents
SmartPower2
SmartPower2 is a power-supply which has WiFi connectivity to control the voltage to and switch on/off a connected device.
You can also monitor the load current and power consumption remotely on your smartphone, tablet and PC.
Specifications
| WiFi MCU module | ESP12E |
|---|---|
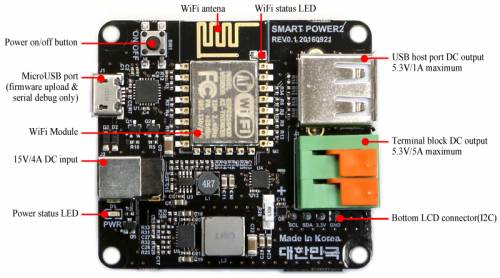
| Output Interface | USB Host, terminal block(+, -) |
| Terminal Block Output Voltage | DC 4 ~ 5.3V in 100mV step |
| Terminal Block Maximum Output Current | 5A |
| USB Host Port Output Voltage | DC 4 ~ 5.3V in 100mV step |
| USB Host Port Maximum Output Current | 1A |
| DC-Jack Input Voltage | 9~15V |
| Measurement | Voltage, Current, Watt, Watt-Hour |
| Display | 16×2 I2C Character LCD |
| Wireless | WiFi 802.11 b/g/n 2.4 GHz |
| Dimensions | 52x46mm |
| weight | 18g, 58g(with LCD) |
How to use
0. First, connect the included 15V/4A adapter and plug the output cable in the terminal block.
Without WiFi (Standalone mode)
1. Output Power ON/OFF
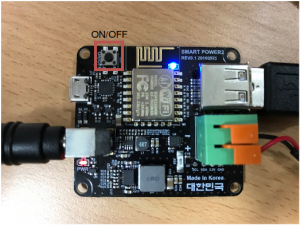
You can turn the output power on/off using the tact switch on SmartPower2
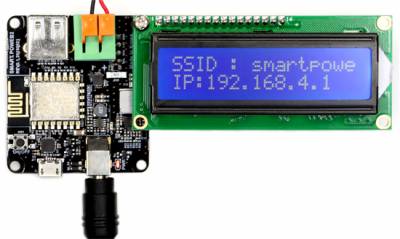
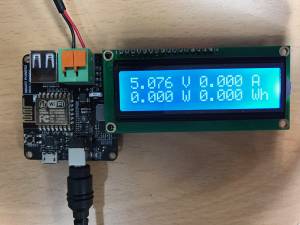
2. Power monitoring with 16×2 LCD
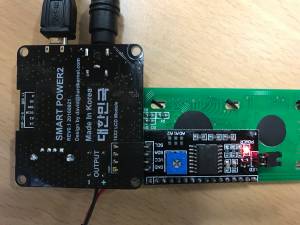
We recommend connecting the LCD after disconnecting the main power source.
With WiFi (Connected mode)
The webpage supports IE 11+, Edge 13+, Firefox 47+, Chrome 49+, Safari 9.1+, Opera 41+, IOS Safari 9.3+, Android Broswer 4.4+, Chrome for Android 53+
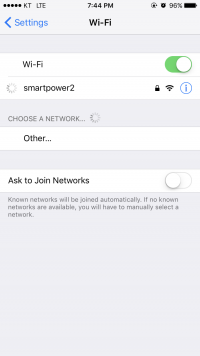
1. WiFi Connection
Default SSID : smartpower2, Password : 12345678
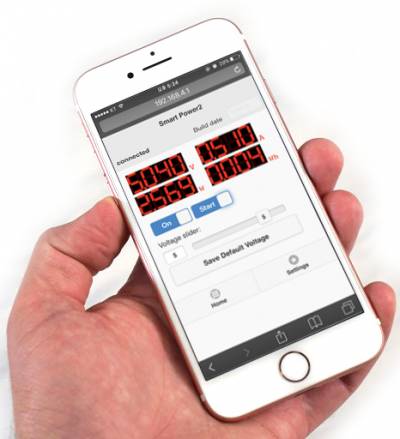
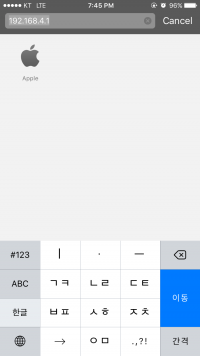
2. Access Web UI
Default webserver ip : 192.168.4.1
| 1. WiFi Connection | 2. Access Web UI |
|---|---|
 |  |
3. Home
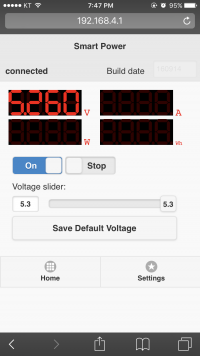
- Seven Segments : voltage, ampere, watt, watt-hour.
- ON/OFF slide : Output power ON/OFF.
- Start/Stop slide : Watt-hour measurement Start/Stop.
- Voltage slider : Change output voltage.
- Save Default Voltage button : Set default voltage.
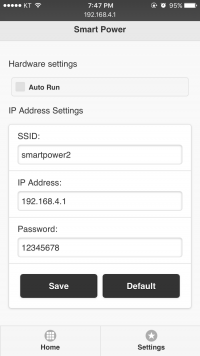
4. Settings
- Auto Run checkbox - Output power ON/OFF automatically when you power on the SmartPower2.
- Save Button - Save Network Configuration (SSID, IP Address, Password).
- Default Button - Initialize User Network Configuration (Factory reset)
With Telnet (Connected mode)
After connection with WiFi, you can get power data via telnet.
[Voltage],[Ampere],[Power],[Watt hour]
$ telnet 192.168.4.1
5.255,0.451,2.374,0.000
5.256,0.451,2.374,0.000
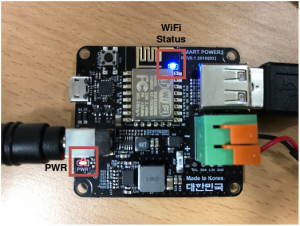
LED State
System Reset
After boot, press the ON/OFF switch for 5 seconds to reset all settings including WiFi.
Hardware
SmartPower2 schematic - schematic_smartpower2.pdf
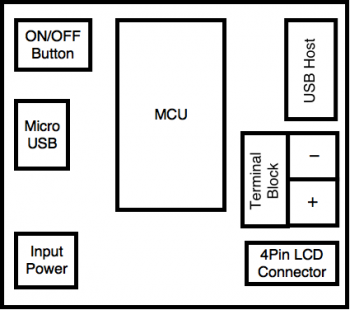
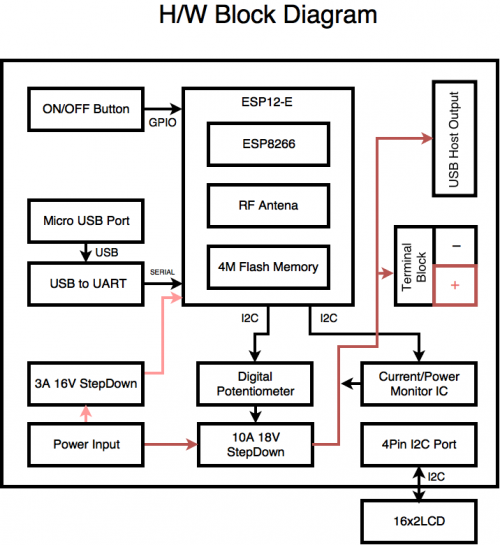
- MCU - ESP8266 Espressif low power 32-bit MCU
- USB to UART - CP2104 single chip usb-to-uart bridge
- 3A 16V Stepdown - MP1495S High Efficiency 3A, 16V, 500kHz Synchronous Step Down Converter
- Digital Potentional Meter - MCP4652 7/8-Bit Single/Dual I2C Digital POT with Volatile Memory
- Current/Power Monitor - ina231 High- or Low-Side Measurement, Bidirectional CURRENT/POWER MONITOR with 1.8-V I2C Interface
- 10A 18V Stepdown - MP8762 High Efficiency, 10A, 18V Synchronous Step-down converter
Software
Build Firmware
This guide is working with x86 platforms only. The development tools are not available for ARM platforms.
Linux
1. Install PlatformIO
sudo apt-get install python-pip
sudo pip install -U platformio
platformio --version
If you have any issue while installing it, refer this guide.
http://docs.platformio.org/en/stable/installation.html
2. Get source code
sudo apt-get install git
git clone https://github.com/hardkernel/smartpower2.git
3. Build & Upload
cd smartpower2
platformio run
sudo platformio run --target upload
sudo platformio run --target uploadfs
Windows
1. Install platformIO
2. Get source code
3. Build & Upload
Run CMD and move to the smartpower2 folder
cd /path/to/dir/smartpower2
platformio run
platformio run --target upload
platformio run --target uploadfs
F/W Version History
| Release Date | Version | Description | Git |
|---|---|---|---|
| Jan 22 2017 | v1.1 | Add console logging with telnet and make SSID unique to each device | https://github.com/hardkernel/smartpower2/tree/v1.1 |
Release Note of F/W v1.1
Thanks to https://github.com/OtherCrashOverride
New features
- Possible Unique SSID on each device
